The Churchill Club is one of the premier business forums in the Silicon Valley. Every month, there’s at least one panel discussion featuring individuals from the who’s who list of the industry’s top executives, thought leaders, and future stars. On December 11, 2001, the Churchill Club joined forces with the San Jose Tech Museum in co-hosting The Tech’s final forum in its Opportunities and Issues in Technology series, Turning Bits Into Memories: Digital Photography Comes Into Focus. Proceeds from the ticket sales benefited The Tech’s Annual Fund for Education.
Stewart Alsop, a columnist at Fortune and General Partner at New Enterprise Associates, served as the moderator to a panel of the following four industry leaders in the digital photography marketplace:
- Katrin Eismann: Artist, Author, Educator
- Eva Manolis: Executive VP, Products and Services Strategy and Co-founder of Shutterfly
- Karen Mullarkey: Independent Creative Producer
- Michael Slater: Chairman, Fotiva
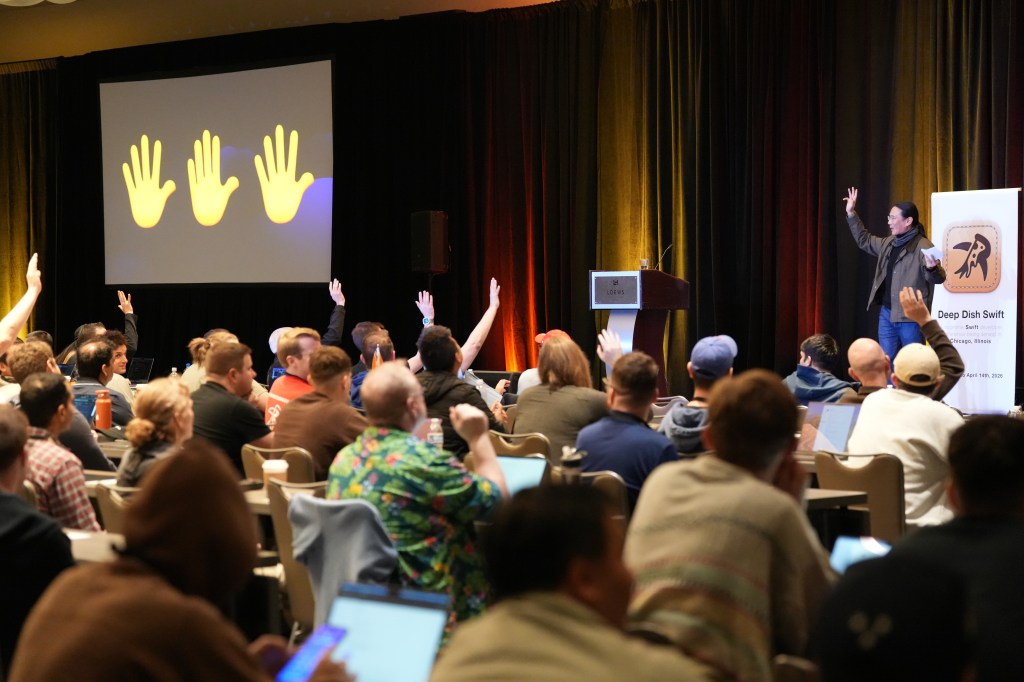
Stewart began the panel discussion by first asking everyone in the audience to raise their hand if they owned a digital camera. About 75-80% of the crowd raised their hand, of which about 50-60% used their cameras on a regular basis. According to one of the panelists, 12% of all homes own a digital camera, so it’s clear that the Silicon Valley is slightly skewed when compared to the rest of the nation.
The first question that Stewart posed to the panelists was which digital camera would the panelists buy and why. The answers ranged from the diminutive Canon S110 Digital Elph to the Nikon Coolpix 5000 to the Olympus E-20. As I’ve said time and time again to people searching for a digital camera, which camera one should buy depends greatly on the types of photos that will be taken. Most people never get prints larger than 4×6, so most 2.1 or 3 megapixel (MP) cameras should do the trick. If you are an amateur photographer who’s interested in replacing the old 35mm SLR camera, get ready to spend a lot of money. High-end consumer or professional digital cameras are still too expensive for most people’s wallets.
During the discussion, Karen made an interesting distinction of separating the set of camera owners into two camps. On the one hand, there are the picture takers, and on the other hand, there are those individuals who make photographs. I often wonder what camp I fall into. I would like to be in the latter camp, but at times, I feel I’m strongly entrenched in the former. There’s a natural tendency for me in the photojournals on the site to post every picture that I take. Naturally, that’s not practical, as I neither have the time nor patience to process and upload every image, not to mention a limited amount of disk space.
In my quest to become more of a photographer, I’ve also had to become my own photo editor. Katrin mentioned that this is happening more and more with professional photojournalists. In the past, the photographers sent their film off to the editors for development, processing, and selection. Digital photography allows photographers to function more autonomously. At the same time, bandwidth issues do not make it practical for photographers to send every high-resolution image they shoot back to the office. So as Katrin mentioned, photographers begin to cull and select images that they feel are the most appropriate. Some may argue that the photographer is being given too much control, too much freedom for image manipulation. I feel that it’s essential for the photographer to have more say in the editorial process, but I also think that a second opinion is never a bad thing when it comes to analyzing and selecting photographs.
It was nice to learn from Karen that most, if not all, photographers for the major news publications are shooting digital. She gave the example of the journalists in Afghanistan; they are all shooting digital and recharging their batteries with their automobiles! The inverter business never looked this good. Also, Michael’s company, Fotiva, was recently purchased by Adobe. Apparently, his company is working on some sort of content management system. If the application is anything like the rest of Adobe’s creative products like Illustrator or Photoshop, I can’t wait. I’ve been looking for a content management system to handle the 40,000 or so photos that I’ve taken since my first digital camera three years ago.
On an unrelated note, I noticed that all of the panelists made heavy use of hand gestures while speaking. It’s clear that the right side of their brains was working overtime! I guess that’s typical for the artsy, creative type.
I was hoping to run into Doug Menuez, who supplied the photographs for Defying Gravity, a book that followed the development and birth of the Newton personal digital assistant from Apple. Unfortunately, Doug wasn’t there, nor was Rick Smolan of the Day in the Life book series fame. I did run into Dan’l Lewin, whom I first met at the Demo 2001 Conference in Arizona this past February. Small world, isn’t it?
On a technical note, I used the 70-200mm f/2.8L IS lens for most of the shots you see in this article. The image stabilizer function worked wonders tonight; I don’t think that I could have gotten the same results with any other lens, to be honest. Michael Reichmann is currently writing a review of the 70-200mm f/2.8L IS on his web site, Luminous Landscape. In his preliminary report, he’s as impressed as I am with the quality and functionlity of this lens. Remember, it’s not just the number of megapixels that determines the value of a digital camera. The quality of the pixels and the lens is very important to determining the quality of the digital image. In this case, the 70-200 is one rockin’ lens. Highly recommended!


Leave a comment